Sunday, October 26, 2014

Early 1970's Torpado Alpha Part II Disassembly

Standard FW on the left Racing on the right
The next step after acquiring the bike and giving it the once over is to take it down to the frame so it can be cleaned up and rebuilt.  I usually like to reuse as many of the original parts as I can, excepting the consumables like; rubber, bar tape, cables and chains etc., but in the case of this bike I am not sure about keeping the stock free-wheel.  As you can see from the picture above it has a minuscule range that while great for racing isn't a great fit for hilly Seattle.

One lesson I have learned is the importance of documenting how things are put together - before I take them apart.  With that in mind I tried to take a lot of pictures while taking the bike down to the frame.
rear brake attachment
Headset spacer order
Front brake attachment
Another thing about taking the bike down to the frame is you find things you can't detect from visually inspecting the bike while its complete.  Is the seat post stuck? is the stem stuck?  thank goodness neither of my biggest fears were realized.  I did find a few unexpected issues though:

a bent seat-post bolt
a bent cotter pin
In addition to the seat-post bolt being bent the cable guide is also pretty rusted so I am going to replace them both.  The bent cotter pin gave me a little fright as I was worried I wasn't going to be able to get it out and then I would have to deal with potentially replacing crank and BB.  Fortunately I was able to straighten out the cotter pin enough to drive it the rest of the way out with the cotter press and that was a big relief.  I have two new cotter pins ready to go and will be able to use the stock crank and BB.
Finally it was down to removing the headset and fork to complete the take down.  One thing I try to do with headset parts is keep them in order and then zip tie them once I have them removed.  They can even be cleaned in the sonic cleaner like that so that I can put things back in the right order.  That is especially helpful when it might be a weeks between disassembly and putting things back together.
Headset removed except for cups
Fork out with lower bearings
Keeping headset pieces together and in order 
So now the bike is down to the frame and ready for the next step - getting all those parts cleaned, polished, lubed and back together.
down to the frame
Speaking of polish I was pleased with how a quick Dremel with brass wire brush worked on the chromed head-tube lugs.
a little Dremel work in the middle of the lug
Now I just need to get motivated and start getting parts cleaned, framed cleaned and waxed, and all four main bearings rebuilt and we can get this Italian beauty back together.  Until next time; Ride.Smile.Repeat.

Saturday, September 13, 2014

In the work-stand: Early 1970's Torpado Alpha


Now that I am done with the campus bike project for my Niece its time to move onto the next bike in the queue while the weather is still nice.  I wrote about the Torpado here back in January, since my options were to work on a complete bike or build one up from a frame-set, old Motobecane Mirage, I went with the complete bike.

I've noticed that on last few projects that I have jumped right in without much thought to whether I had all the parts I needed, so for this project I decided to give my parts bin and the bike a careful going over.  That helped me realize that I did not need to order brake pads, but that I was out of new chains and 27" tubes.  It was pretty obvious I would need new tires.
"All Original"
One benefit of a careful inspection was I discovered something about my brake levers.
The sharp eyed will notice that the levers are not the same.  One is fairly nice with a built in quick release.
The other is a converted "safety lever" model and is a bit Rube Goldberg to my eye.
Call me anal but it would bug me to finish the bike with this set up, fortunately I have a nice set of drilled Weinmann's that I can use instead of the existing set.

However there is one issue, ain't that always the case!, the drilled levers have no clamps for the handlebars so I am hoping I can cannibalize the mismatched set to make this work.

Giving this bike a careful once over also made me realize I would need to change how I route the brake cables.  Normally I like to run the the right lever to the rear brake but on this bike there is internal routing for the rear brake cable on the left side of the top tube so using my normal routing would mean some messy cable routing, so for this rebuild I am going to run the left lever to the rear brake (which I believe is how motorcyclist run their brakes) to keep things tidy.

So now that I have things scoped out and all the parts assembled (I hope) the next step is to take this Italian beauty down to the frame and start the rebuild, and find out what I have missed ;-) 

Until next time; Ride.Smile.Repeat.

Monday, September 1, 2014

1977 Raleigh Record LTD Mixte- Campus bike rebuild Part IV- Finished!

Well after what seems like way too long I finally got my Nieces' campus bike finished.  And I am glad to report that after all the trouble shooting I did yesterday that the running of cables and dialing in of brakes and shifting when pretty smoothly.
routing cables with basket
close up of the rear straddle cable "Racer" Hack
rear brake hooked up

 I am very pleased to be able to complete this bike so my Niece can get it down to Corvallis with her this week.  The good news is that we both have the same car -late 90s/early 2000s Honda civic 4 doors and I was able to get the bike in mine so it should work in hers.  The catch is I needed to do things like remove the basket, front wheel (naturally) and loosen up the stem to get it to fit so I will be giving her a crash course in reassembly before she leaves.

I am hopeful this bike will be useful and reliable transport for her while she is in grad school.  And it will be nice to know a bike I built is tooling around my old stomping grounds.


I hope the finished product was worth the wait for those of you who have been following this series on the Campus bike.  As always ride.smile.repeat.

Sunday, August 31, 2014

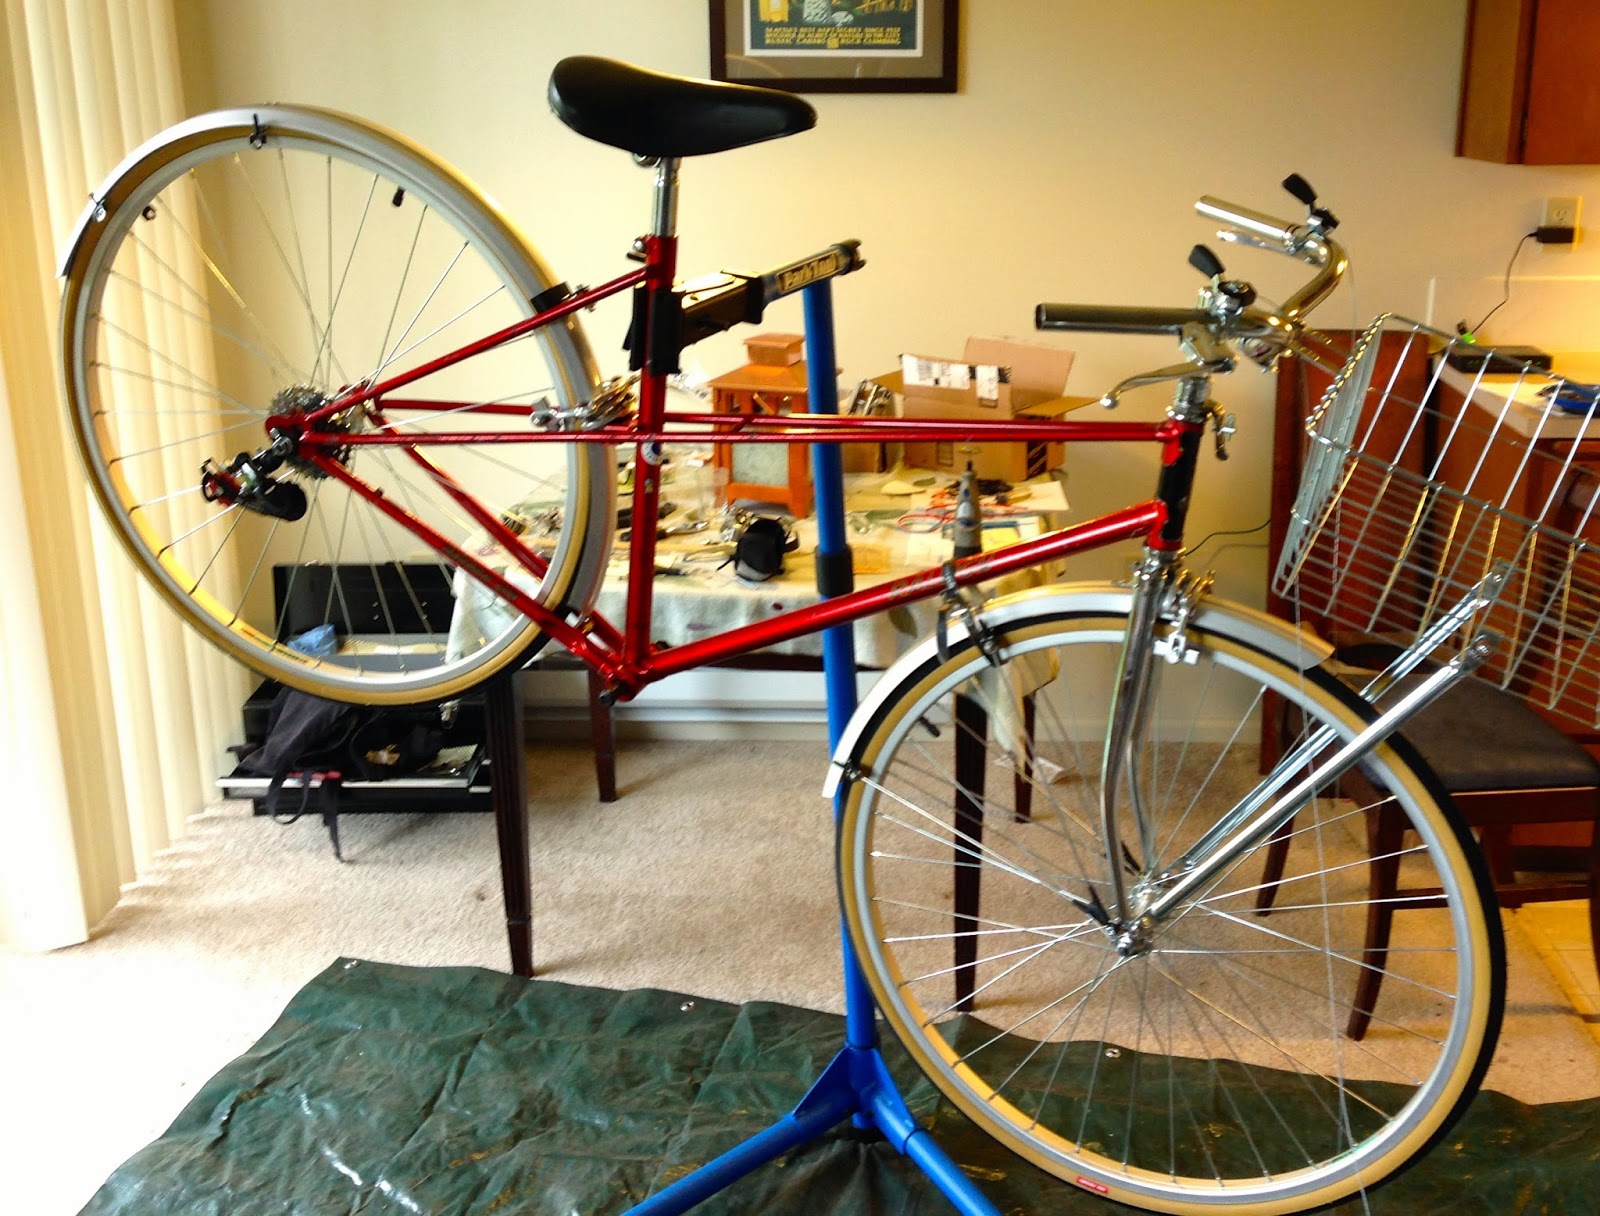
1977 Raleigh Record LTD Mixte- Campus bike rebuild Part III-fixing issues

Coming along
When I left this series I had encountered a problem or two, or five.  As you can see above the bike is starting to look like, well a bike.  It has a ways to go, however,  I feel like I am in sight of the home stretch, but lets talk about how I got here.

Problem 1: BB spindle nuts.  I had bought nuts that were too big, this was fairly easily solved when I went to a local bike shop, Recycled Cycles, and asked the guy at the service counter if they had the nuts and he pulled out a whole box and encouraged me to take 3 just in case.  This was the easiest issue to resolve.
Now I have enough room to tighten it!
Issue 2: Rear brake straddle cable too short.  This was a bit of a pickle as I couldn't find a straddle cable with the round pieces on each end that were any longer than 110 mm.  When I was at Bike Works I pawed through the bin of old brakes and came across some Mafac racers (I posted about them a while back here) and it made me think that might be an option because of the adjustable straddle cable.  Unfortunately due to the funky rear brake setup you need a brake with a long reach and the only Mafac Racers I have ever come across are standard reach and therefore too short.  Dang!...but what if I could combine my current Weinmann center-pull that works reach- wise with an adjustable brake cable like the Mafac? hmmm.  As it turned out I had once incorrectly bought some cantilever brake straddle cables that had the length I needed but had a funky grandfather clock looking end that wouldn't work with my center-pulls but what I if nipped that part off?
looking like a Mafac Racer solution
Using the bolt from a straddle cable hanger, with the hole in it for cable to go through I could fashion a Racer like solution on one end of the center-pull brake arm.  Like this;
Thats more like it
Issue 3: Fork steerer length too long.  Now all I needed to fix this issue was a hacksaw, a vise and a steady hand.  I only had the hacksaw and decided this was a job for the local bike shop, they did a great job, made a nice clean cut and didn't mess up the threads as I feared I would.  Well worth the $5 they charged me.

Issue 4: Wrong fork race.  As I mentioned I should have ordered a headset with a 27.0 fork crown race but had ordered a 26.4 and so it didn't fit which meant I couldn't connect the fork.  I was saved again by having ordered wrong before.  When I was building up an Azuki as a single speed -7 years ago-I ordered a new headset which I took to a local bike shop for them to install only to be told I had purchased the wrong size.  They ordered a correct one and the one I ordered has been rattling around in my parts box for almost a decade, fortunately it had a 27.0 fork crown race-whew.  With the correct race seated I was able to mount the fork and now I have a headset with a 26.4 fork crown race to rattle around in my parts box.  As you can see from the picture at the top it all came together.

Issue 5: Front Derailleur is too big.  In the same trip that got me the correct BB spindle nuts I was able to pick up a different front derailleur, a nice old Shimano.  This time I was smart enough to bring a %$#@! caliper so I could measure it.
FD sorted 
So now its time to hang some parts, run some cables and get it dialed in.  More to come soon.  Until then -Ride.Smile.Repeat.

Sunday, August 17, 2014

1977 Raleigh Record LTD Mixte- Campus bike rebuild Part II-nobody said it'd be easy

Well, not everything went wrong...I did get the seat post cleaned up.
a bit rusty
fairly shiny
What the pictures don't show is that I also took apart the clamp, cleaned it up and greased the rails and got it all back together.


I also got the bottom bracket cleaned up and installed.
prepping
Installed minus lock ring
Then things got a bit bumpy.  First issue bottom bracket spindle nuts.  I thought I could just get them at the hardware store...wrong.  I found nuts that were the right size and thread pitch but they were too fat!  no room to get a socket in to turn the bolt.
bigger not better

Issue number two the center pull straddle cable didn't work for the rear brake.  On a mixte the rear brake is a bit funky mounting to a bracket about halfway up the seat tube and needing to go around that tube.  A standard 110 mm straddle cable, I found out doesn't have enough length to do that.
a bit tight
Issue number three was fork steer tube length.  I knew when I ordered the replacement fork that it would be longer than the original and so I also ordered some spacers...just not enough.  I don't have a picture of that, think I was swearing, but imagine the top nut and then a space of threads and then the top spacer.

Issue number four was also fork related-crown race size.  As I mentioned in Part I, a new headset got ordered when I ordered the fork.  Now as you may know for most 10 speed forks there are two sizes of fork crown races either 26.4 or 27.0.  I ordered the new headset basing the size on what a 1977 Raleigh would have come with-26.4.  WRONG.  I should have considered the size of the crown race on the new fork I ordered which was of course -27.0.  It occurred to me I had an issue when I was trying to set the crown race and the damn thing wouldn't budge.
Fork packaging with the determining measurement
Nice ordering you git!
And lastly, I hope, issue number five was the front derailleur.  As I pointed out in Part I this bike lacked an FD, and so I went to Bike Works to pick up a used one.  As you may know most bike boom bikes had 28.6 diameter seat tubes while later aluminum bikes came with beefier 34.6 seat tubes.  The FD I picked out was a SunTour and therefore pretty old so no worries about the clamp diameter right?  Yep WRONG when I got it home and dry fitted it I found it was too big.

The good news is I have figured out work arounds for all of those issues which I will get into later, the bad news is I spent so much time sorting them that I had very little time to assemble the dang bike.
coming along...slowly
So rather than spending the weekend assembling the bike and finishing it on Sunday, I spent my time trouble shooting.  Part III is going to be a bit delayed as I am going on vacation next week so sometime after that I will finish the bike (I hope) and this series of posts.

Until then -Ride. Smile.Repeat.


Saturday, August 16, 2014

1977 Raleigh Record LTD Mixte- Campus bike rebuild Part I

I mentioned back in June that I was going to build up a Raleigh mixte as campus bike for my niece who is going to grad school this fall.  I came into this bike about 3 years ago and in the time since it has lost a few of its original parts to other projects like; the wheel-set, both derailleurs, and rear rack to name a few.  In addition to needing to replace the missing parts I also wanted to use a different handlebar set up, add fenders and a front Wald basket.  Anyway lots of parts to order.  I got the new wheels and tires from Amazon early on so I started with them.

My experience with factory built 27 inch wheels is that the hubs are too tight so even thought these were brand new I still opened them up to add grease (the factory is miserly IMHO) and then adjusted the hub bearings.  With some new rim strips, tubes and tires (fatter 27 x 1 3/8") the wheel set was ready to go.

Unfortunately, I still had a stuck stem to deal with, the same issue that had this bike languishing in my queue for so long.  I got to a point where not only was I still working to cut through the stem remnant but the plug (which was still rattling around in the fork) got wedged sidewise.  After consulting my LBS and figuring out I would have to pay a shop rate of $80 an hour (which I don't begrudge them) for them to try and finish the job, I came up with a new plan.
Turns out Amazon.com sells a Sunlite replacement 27inch fork and so I ordered one.  I had mentioned to the mechanic at the LBS I was thinking of getting a replacement and he wisely reminded me that since Raleigh used proprietary threading I would not be able to use my original headset, so I ordered a vanilla Tange replacement headset at the same time- more on that later.

Since I had to wait on the fork and headset I figured I could pay some attention to the paint.  I used the Meguiars three step process I first heard about over at Hugh's bicycle blog.  I used it on the Fiorelli rebuild and liked the results so decided to try it on the mixte.
Step 1- Clean
Step 2 - Polish
Step 3- Carnauba baby!
Now the this Raleigh frame is nearly 40 years old and shows its age with rock chips and dings but man does that paint shine after this 3 step process!

The Wald basket and the SKS fender-set had arrived, the paint was in as good a shape as it could possibly get and once the spanking new fork and headset came in I would be able to get down to business building this bike up into a campus commuter right.......right?

In Part II of this series I will explain why nobody ever said this rebuild was going to be easy.