Showing posts with label 1983 Raleigh Record. Show all posts

Saturday, April 14, 2018

Campus bike part IV: Finished! (1978 Schwinn Traveler III)


The correct shim arrived and I didn't even have to give up my kingdom for it, a few tries and..


we have snugly fit handlebars, and we are (hopefully) past the last road block on this build.


It looks good with the bars finally on it, and maybe I'll do just a bit more.


I ended Wednesday night with shifters, brake levers and grips mounted to the bars.


Friday night I ran the shift cables and housing, and did a bit of test to see they worked.


This morning I started with removing the rear wheel to mount the kickstand I had picked up at bike works.  I also ran the brake cables and housing and then made a startling discovery....


at some point I had bought a pin connector model chain!  I hate this style and swore off them years ago.  When I opened the box I was looking for the quick connect link only to realize, with mounting horror, that it was old school.


Note to self; do NOT buy the Z50 model KMC chain again, not matter how good of a deal it is!


I do have the right tool and knowledge for this type of chain and I did get it mounted, I just didn't like it.  While I was not successful building this bike for zero $ out pocket, it did get major donations from the parts bin.  The rear wheel, freewheel, crank-set, brakes and rear derailleur came from the 83 Raleigh Record (Junk bike).  The saddle and seat post came from the 74 Nishiki Professional, the handle bars, grips, rear rack and bottle cage came off the Raleigh Rapide mixte and items like the levers, shifters, pedals and front wheel came from who knows where.  I did end up spending about $20 for; 2 MTB brake cables, 21 mm Schwinn specific stem, handle bar shims and kick stand.


From 10 feet away the bike doesn't look too bad, from 10 inches away the rough condition is pretty clear.


The Traveler won't win any beauty contests but should provide functional transportation.  Finishing the campus bike means all the projects I intended to build for sale are done!  Well, mostly done, the Traveler is on CL, but as I was adjusting the shifting and then wheeling the bike out for pictures I wasn't thrilled with how noisy the FW is.  Bikes don't actually fly off the shelf at this time of year, the Mixte finally sold after about a month on CL,  so I should have time to do a FW swap to see it makes things better.


Packages have started to arrive for the Cresta GT and I received a tool that may solve my threaded headset spacer issue, I'll let you know.

Ride. Recycle old bikes. Smile. Repeat.

Sunday, March 18, 2018

Campus bike Project (1978 Schwinn Traveler III)

I could have called this J*nk bike II, but based on the way it ended last time, I didn't want to jinx things.


You may have noted a few days ago in my shots of the great porch clean up that one bike and one wheel-set remained.  The 1978 Schwinn Traveler III was close to joining the trip to the scrap yard, but I thought that I had enough parts to make a working bicycle and that I could achieve multiple goals in one project; reduce my clutter, make a usable bike without spending any money, and put some $$ in my pocket.  This bike piqued my interest last May and I thought I would give it a shot.


The Traveler in now in the work-stand and the first thing I noticed is that the seat post, even though is has a LeTour mark, didn't seem to fit quite right, close but not really a great fit.


So I tried the sprung saddle with seat post from the 1974 Nishiki Professional and it fit like a charm.


My philosophy for this project boils down to three things; ugly, functional and cheap.  I think ugly will take care of itself especially if I resist the urge to clean and wax the frame, ugly is a theft deterrent, which is key for a campus bike. 


For the functional part I knew I was going to need to check the bearings, when I was working on the Mirage hubs I also checked the hubs on the spare wheel-set, and I made sure they weren't dried out, I did add some additional grease but they should be fine.  The headset though, is gonna need some work, as you can see from the photos above.


This frame has rear brake cable guides and half a rear derailleur guide on the chain stay but no shift cable guides on the down tube.  Parts bin to the rescue!  it yielded Huret and Shimano bolt on cable guides to solve that problem.


I have the wheels and rubber taken care of, its a mishmash but it should be functional, one tire is specialized and one is Boontrager, the front wheel is Shimano and I'm not sure about the rear one but they should get the job done.  Since I am using "previously owned" tubes I have pumped them up to be sure they hold air before I mount them.


The cockpit shapes up like the photo above.  I already talked about the saddle and seat post, the handlebars and grips were part of the 1980 Raleigh Rapide mixte purchase from bike works.  If I hadn't sold the three sets of SunTour stem shifters in the parts bin on ebay last month, I would have set this up for stem shifters but I had a bunch of plastic thumb shifters in the parts bin so that is what I am going to use.  I should admit that when I went to buy a MTB brake cable to finish the Mixte project I bought two additional cables with this project in mind so I have actually spent $4 so far, not sure where the city levers came from.


For the drive train the crank, rat trap pedals, and the SunTour U, RD all came from the 1983 Raleigh Record of Junk Bike fame.  The 110mm bb is a modern sealed bearing unit that was in the parts bin as were the second RD, FD and plastic pedals.  I hope to get a working drive train this collection.


The Side pull brakes also came from the junk bike.  With a bit of clean up and sanding the Kool Stop brake pads should be usable but the barrel adjuster are very rusty so  I am planning to use them to test oxalic acid for dealing with rust.


For extras I have a Pletscher rack and a clamp on water bottle cage which both came from the 1980 Raleigh Rapide Mixte.


I didn't use the rack on the Mixte project in part because I had misplaced both a key bracket and the nuts and bolts.  I have since stumbled across the bracket which I taped to the rack so I wouldn't lose it again.  I was also able to come up with enough hardware (lower left bottom picture above) that I should be able to mount this rack.  I like to think that both my father, and grandfather, a carpenter, would be glad I had a collection of  random nuts, bolts and washers, however they might be wondering how a guy in his fifties only has two small tins worth.


The plan is to assemble all these parts into a ugly but functional bike, sell it for $50 on Craiglist and hope it ends up cruising someplace like the University of Washington -pictured above.

Until next time; Ride, Recycle, Smile, Repeat.

Saturday, March 10, 2018

And then there were three

Ok that isn't actually true yet but it's the goal, get down to three bikes in the whole apartment;

Those three will keep me plenty busy as the last two both need the complete overhaul/spa treatment, and even the HD needs new bar tape and a few tweaks.


The pictures above are from June of 2017 and chronicle the height of the bike zaniness,  it can be tough to see it all but there are; two complete mountain bikes, two complete road bikes and five frames, as well as various wheel-sets occupying my humble balcony.


The pictures above reflect how things look today, just a bit of a change.  What happened to all the stuff you ask?

  • The 1978 Schwinn Traveler and one wheel set remain in the on deck circle- a project in waiting
  • The 1980 Raleigh Rapide is completed and listed on CL for sale
  • The Green 1973 Motobecane Mirage is in the work stand and is close (fingers crossed) to being done and will be sold on CL.
  • The Yellow Motobecane Mirage frameset was sold along with a few french parts and a wheel-set.
  • The 1960 something,Torpado Alpha Frameset and all its parts were sold as a project and I threw in a bunch of new consumables; tires, tubes, cotter pins, cables, etc.
  • The 1984 Nishiki Cascade was sold with new tires as a project.
  • The 1986 Miyata Trail runner was sold - the guy traveled 50 miles just to get the stock wheel-set.
  • The wheelset from the 1974 Nishiki Professional with the sanshin high flange hubs got moved inside and if I am dumb enough to buy a frame only project down the road they will be ready.


The last two residents of the balcony along with some wheels and rims and various metal bits went to the scrap yard (sad trombone).

I did harvest many parts from both of the bikes above some of which have been sold on and some of which may appear again soon in a future project.  For the Nishiki Professional as an example, I kept the wheel-set, and the seat post and saddle, while the stem, shifters, and derailleurs got sold. The Sugino bottom bracket and crankset I may also clean up and sell.  I should have never bought that bike but I think I at least broke even.

Some of these projects have been lingering for 5 years and it was cathartic to clear them out.  It also didn't hurt to put some $$ in my pocket.  I still have two projects I want to complete before tacking the Nishiki Cresta GT,  and after that I have the long overdue MotoGT to give a well deserved overhaul, so I am far from out of the woods.  After I get through all that I hope to take more of a one at a time approach to my rehab projects.  We'll see how that works out... lol. 

in the workstand

Until next time. Ride.Smile.Don't hoard.Repeat.

Thursday, May 11, 2017

Junk Bike Part 2 - The Finale, its called Junk for a reason (1983 Raleigh Record)


Well it started off ok, the binder bolt went into the seat collar, which I was a little worried about because its kind of off kilter.  And then I put the seat post in and tightened

I found that if grabbed saddle and twisted it would rotate slightly back and forth, hmm shouldn't do that if its tight. So I went a bit gorilla and really tightened the binder bolt.  Now its not moving and then when I go to loosen up the binder bolt again it all goes south.

evermore...
I didn't back it off much and of course the seat post comes right out but I now I can't get the binder bolt to loosen any more, and then I realize that the keyed side of the binder bolt which, in theory, slots into the seat collar, is just turning - its not keyed anymore.  I get a hex wrenches on both sides and try to undo it and still it won't budge.   I step away and concede this ain't gonna happen, oh there are things I could do but this was a free bike I was planning to build as a junk bike in the first place so I am going to walk away.

So what am I left with?

  • A frame-set to take for scrap with what was a nice new binder bolt.  It's actually good because I have a number of other metal items that could go to scrap and who knows I might make a little money and at least I will have de-cluttered the Apartment a bit.
  • A rear Wheel of circumspect quality, and since its an old bolt on I may just put it in the scrap pile as well.

  • A box of parts that may have some value and at the very least will give me fodder for experimenting with new de-rusting process.

  • The value of listening to your gut and exploring the deal breaker issues early in the process.  I am frustrated at this fail with the seat post but I would have been in tears to have prepped everything and had this fail at the end while putting the bike back together
I also benefited from having to better organize my bike stuff while looking for the binder bolt and sealed bb, I found I didn't have to use the still in the package cable and housing set.


In going through my stuff I realized I had enough scraps and spares that I could easily field a complete housing and cable set and it wouldn't matter if it was mismatched when I was using it on a junk bike although I think and ebony and ivory combo would be fine on any bike.


What I might have done differently on this project is used my fancy digital caliper for more accurate readings on the seat tube, it needs a battery so I just went manual but it probably would have been worth having a more accurate reading.  I suspect that this bike needed a 26.0 mm seatpost -but we'll never know.  I looked on the web but couldn't find a reference, the catalog from 1983 just listed the seat posts by material i.e. alloy versus chromed steel.

I think I may have been sent the message that bikes left out for free are no bargain, especially if they are Raleighs!  The curbside Raleigh Gran Prix had a compromised frame from a front end crash and this Raleigh Record has a useless frame due to the seat tube issue, but hey at least they were free and I've harvested parts off both bikes.  Is it three strikes your out or third times a charm?  I'm dumb enough to find out some day.

A moment of silence for the Record and a salute to the bike it once was.  Ride.Smile.Repeat


psst - did someone say scrap?


Wednesday, May 10, 2017

Junk bike Part 1 -Disassembly (1983 Raleigh Record)


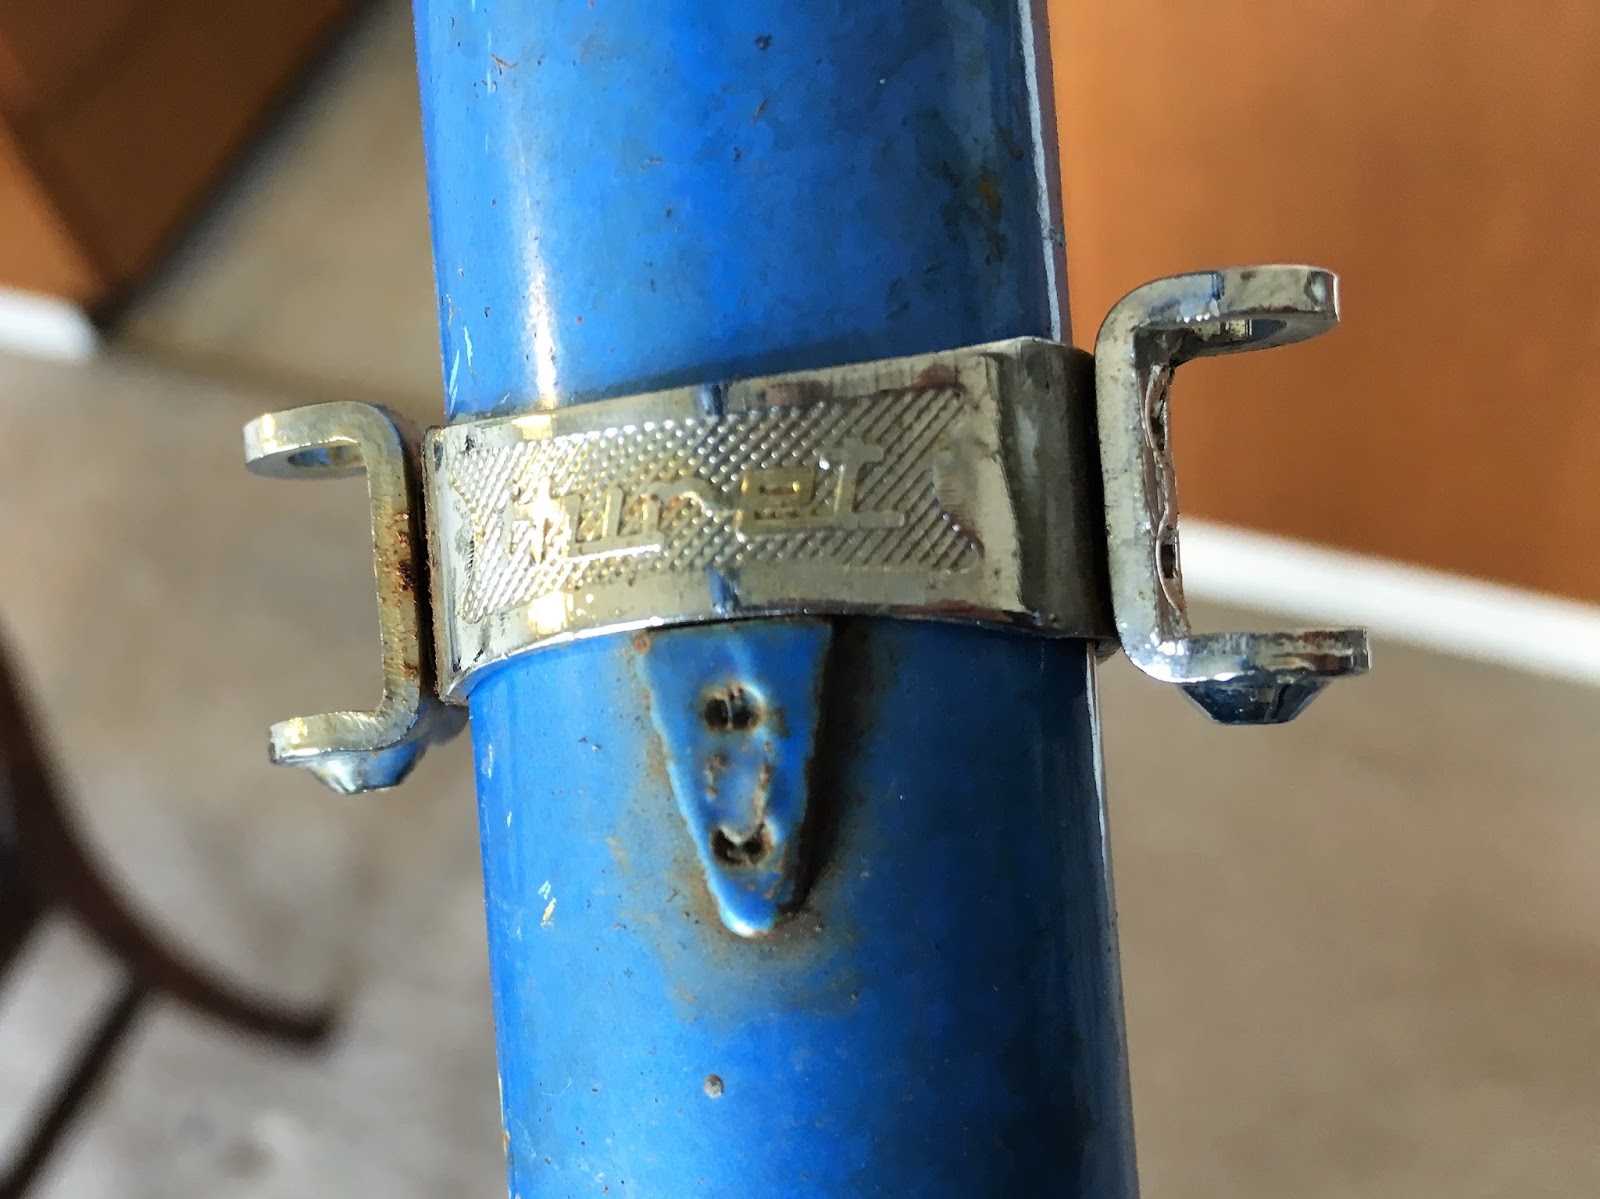
Based on the shape of the rest of this bike, it is surprising how good the head-badge looks, it practically gleams, as if to say I was once a proud road bike and didn't always look like I should be going to the dump!  As you saw from my last post I got a bit ahead of myself yesterday and starting pulling things off the bike, when you're already lacking the front wheel and the saddle/seatpost combo it doesn't take long.


I stole the penny in visegrips as a tool to remove crank bolt dust caps trick from Hugh's blog and it worked great on the drive side but the non-drive side was another story.

bad penny!
The cap was so brittle it just kind of broke in small pieces but not before bending my penny! -that might be a federal offense for crimes against currency - shhh.  I eventually, carefully, chiseled all the bits out and then the crank arm didn't want to come off at first but I persisted.  And that got me to yesterdays teaser shot with a few cups and bits still left.


The fixed bb cup is usually a bear to get out requiring tricks and cajoling but this time it broke loose with just some firm pressure.


And my special head set cup tool removes them in a jiffy with just a sharp hammer blow so now I had all three cups left over from yesterday out of the frame.  You'll note I put a bit of tape on the upper cup so I could tell them apart, on many frames its pretty easy to distinguish upper and lower but on this Raleigh they look identical.


I even took the bolts out of the water bottle cage mounts, more on that later, I thought this might be an aftermarket job but I checked the Catalog shot and this year Record did indeed have water bottle cage mounts. 


And so we are down to a very bare frame.

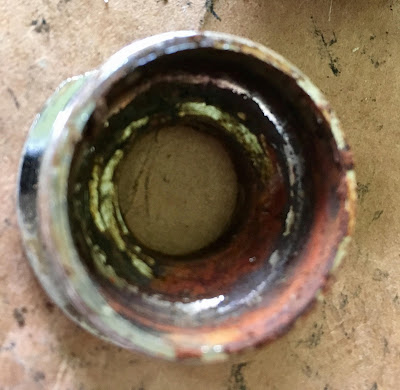
Fixed bb cup rusty and dry
 And man did I discover some neglect on this poor, left on the side of the road frame, in fact I doubt it saw a spec of grease in the 30+ years since it left the Raleigh factory.  Very dry and very dusty throughout.

The bb shell was dry, rusty and full of debris.


The bb was also dry and rusty


Like wise the headset, I use a zip tie to keep it all together and to remember the order, I need to size the bearing cages to be sure but they will almost certainly be getting chucked in favor of new ones.

I had to make a special trip for this rust inhibitor and at $25 I have spent less on whole bikes but seeing all the rust in the junk bike got me thinking and although in all the time I have been working on steel frames I have never used any, maybe its time.  If this can gets me through 5 bikes it will be worth it.  Not sure what affect it has on bikes where there is probably rust in the tubes already, but it can't very well hurt.  That's why I took out the water bottle braze-on bolts so I would have more holes to spray in.


While out I also picked up some Oxalic acid to try out for derustification, and I have lots to practice on; seatpost, headset cups, brake adjustment screws, shifter collar to name a few.  The brake adjustment screws are attached to the aluminum brake arms and I have read differing accounts on the web about using this acid on aluminum but I going to try it out.  Most of the concern is for anodized aluminum which mine is not and frankly worse case scenario it goes bad - oh well, it was a free and its just going to be a junk bike.


And I didn't forget the protection, be safe out there boys and girls.


Now me being me, I wanted to rush ahead and start with the rust removal and a bunch of other stuff but although I'm slow, I do learn stuff - sometimes.  I noted two areas of concern on this bike I wanted to address before diving in.  The first was the seat post, when I first brought this bike home the seat post and saddle just popped off the bike without me doing anything more than lifting on the saddle.  I was concerned that I might have one of the following:
  • Seat post too small for seat tube
  • Jacked up hardware store binder not doing its job
  • Seat tube messed up
The 1983 Raleigh catalog is sadly lacking on seat post diameter details so it was caliper time.


First to measure the seat post width


Then compare that to the seat tube exterior


And finally flip the caliper and measure the inside of the tube.  Now I am not going to tell you I can detect a .2 mm difference in size but I was looking for something obviously wrong and as my Dad, a Federal Employee for 30 years, used to say "Close enough for government work".


My next step was to see if I had a binder bolt to replace the hardware store side show it came with.  I was sure I had one but couldn't find it when I looked last night.  I had plenty of other things to do on the bike but I was determined to deal with the seat post issue first.  I spent about an hour taking apart all my boxes and storage of bike parts and in the end I found it!  Tomorrow I will test it in the seat tube collar which is a bit banged up and if I can seat it. And then I will see if I can get the seat post to stay in place.  If it doesn't end up working then I might try a 26.0 post or I might move on and I will have saved alot of time and effort.


Speaking of searching I was also able to find the previously used sealed square taper bb I also couldn't find last night.  It has a 113 mm long spindle so it should work with the double chain-ring crank this bike has, and after seeing the shape the original bb was in (Toast) this should be an improvement and a time saver.


My second big concern is the rear wheel, the nut and spacers, and possibly the axle, are rusty and based on the rest of the bike I am sure the hub is dry so I want to address the hub and see if I can get it cleaned up, lubed, and turning half way smooth before proceeding.  I might have a replacement but again I want to figure out if I have a deal breaker before I spend a lot of time on this bike.  It doesn't have to be prefect for the Junk bike but it does need to work.


It hasn't all been wrenching, I have been taking advantage of the warm and sunny weather , this was Tuesday.


It was so nice I got iced coffee which I rarely do.


Today I just rode straight through with no stops, the only downside is I have had a bit of neck stiffness after both rides, neither of which was over 11 km, it didn't last long but I will have to watch that.  I find it especially odd as both bikes, I am trying to share saddle time so no one gets jealous, are set up with the bars above the saddle.

Hopefully more to come on the Junk bike, as always Ride.Smile.Repeat.