Based on the shape of the rest of this bike, it is surprising how good the head-badge looks, it practically gleams, as if to say I was once a proud road bike and didn't always look like I should be going to the dump! As you saw from my last post I got a bit ahead of myself yesterday and starting pulling things off the bike, when you're already lacking the front wheel and the saddle/seatpost combo it doesn't take long.
I stole the penny in visegrips as a tool to remove crank bolt dust caps trick from Hugh's blog and it worked great on the drive side but the non-drive side was another story.
 |
| bad penny! |
The fixed bb cup is usually a bear to get out requiring tricks and cajoling but this time it broke loose with just some firm pressure.
And my special head set cup tool removes them in a jiffy with just a sharp hammer blow so now I had all three cups left over from yesterday out of the frame. You'll note I put a bit of tape on the upper cup so I could tell them apart, on many frames its pretty easy to distinguish upper and lower but on this Raleigh they look identical.
I even took the bolts out of the water bottle cage mounts, more on that later, I thought this might be an aftermarket job but I checked the Catalog shot and this year Record did indeed have water bottle cage mounts.
And so we are down to a very bare frame.
 |
| Fixed bb cup rusty and dry |
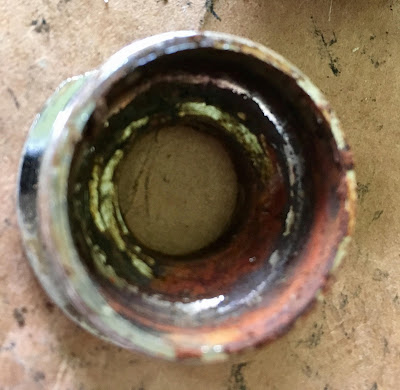
The bb shell was dry, rusty and full of debris.
The bb was also dry and rusty
Like wise the headset, I use a zip tie to keep it all together and to remember the order, I need to size the bearing cages to be sure but they will almost certainly be getting chucked in favor of new ones.
I had to make a special trip for this rust inhibitor and at $25 I have spent less on whole bikes but seeing all the rust in the junk bike got me thinking and although in all the time I have been working on steel frames I have never used any, maybe its time. If this can gets me through 5 bikes it will be worth it. Not sure what affect it has on bikes where there is probably rust in the tubes already, but it can't very well hurt. That's why I took out the water bottle braze-on bolts so I would have more holes to spray in.
While out I also picked up some Oxalic acid to try out for derustification, and I have lots to practice on; seatpost, headset cups, brake adjustment screws, shifter collar to name a few. The brake adjustment screws are attached to the aluminum brake arms and I have read differing accounts on the web about using this acid on aluminum but I going to try it out. Most of the concern is for anodized aluminum which mine is not and frankly worse case scenario it goes bad - oh well, it was a free and its just going to be a junk bike.
And I didn't forget the protection, be safe out there boys and girls.
Now me being me, I wanted to rush ahead and start with the rust removal and a bunch of other stuff but although I'm slow, I do learn stuff - sometimes. I noted two areas of concern on this bike I wanted to address before diving in. The first was the seat post, when I first brought this bike home the seat post and saddle just popped off the bike without me doing anything more than lifting on the saddle. I was concerned that I might have one of the following:
- Seat post too small for seat tube
- Jacked up hardware store binder not doing its job
- Seat tube messed up
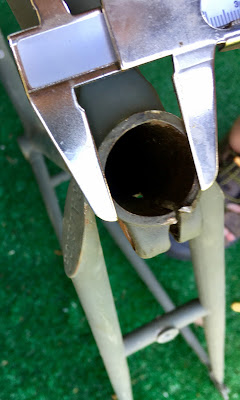
First to measure the seat post width
Then compare that to the seat tube exterior
And finally flip the caliper and measure the inside of the tube. Now I am not going to tell you I can detect a .2 mm difference in size but I was looking for something obviously wrong and as my Dad, a Federal Employee for 30 years, used to say "Close enough for government work".
My next step was to see if I had a binder bolt to replace the hardware store side show it came with. I was sure I had one but couldn't find it when I looked last night. I had plenty of other things to do on the bike but I was determined to deal with the seat post issue first. I spent about an hour taking apart all my boxes and storage of bike parts and in the end I found it! Tomorrow I will test it in the seat tube collar which is a bit banged up and if I can seat it. And then I will see if I can get the seat post to stay in place. If it doesn't end up working then I might try a 26.0 post or I might move on and I will have saved alot of time and effort.
Speaking of searching I was also able to find the previously used sealed square taper bb I also couldn't find last night. It has a 113 mm long spindle so it should work with the double chain-ring crank this bike has, and after seeing the shape the original bb was in (Toast) this should be an improvement and a time saver.
My second big concern is the rear wheel, the nut and spacers, and possibly the axle, are rusty and based on the rest of the bike I am sure the hub is dry so I want to address the hub and see if I can get it cleaned up, lubed, and turning half way smooth before proceeding. I might have a replacement but again I want to figure out if I have a deal breaker before I spend a lot of time on this bike. It doesn't have to be prefect for the Junk bike but it does need to work.
It hasn't all been wrenching, I have been taking advantage of the warm and sunny weather , this was Tuesday.
It was so nice I got iced coffee which I rarely do.
Today I just rode straight through with no stops, the only downside is I have had a bit of neck stiffness after both rides, neither of which was over 11 km, it didn't last long but I will have to watch that. I find it especially odd as both bikes, I am trying to share saddle time so no one gets jealous, are set up with the bars above the saddle.
Hopefully more to come on the Junk bike, as always Ride.Smile.Repeat.


No comments:
Post a Comment